Tutorial on how to export polygons in QGIS into geojson for later use in Fields2Cover
Create a polygon layer
Open QGIS.
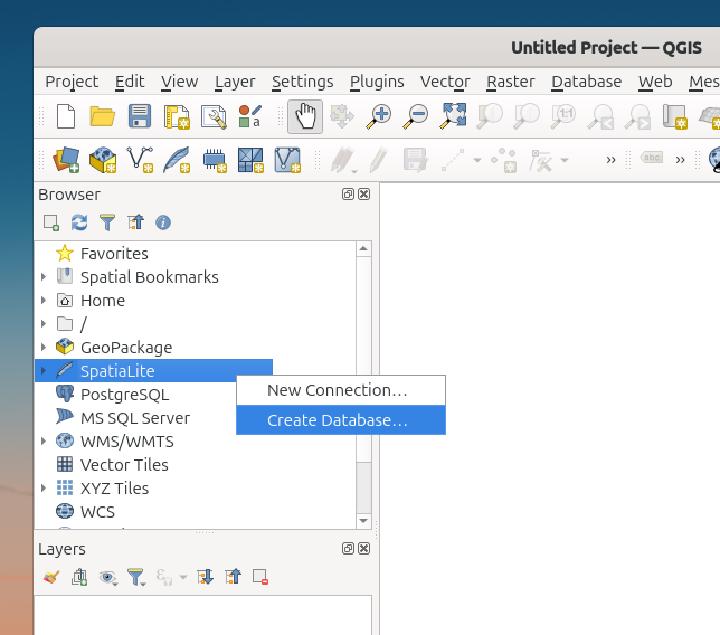
In the left side bar, right-click “SpatiaLite” and select “Create Database…”
You will be asked to save the database in a .sqlite file somewhere on your disk.
In my case I called it tutorial.sqlite.
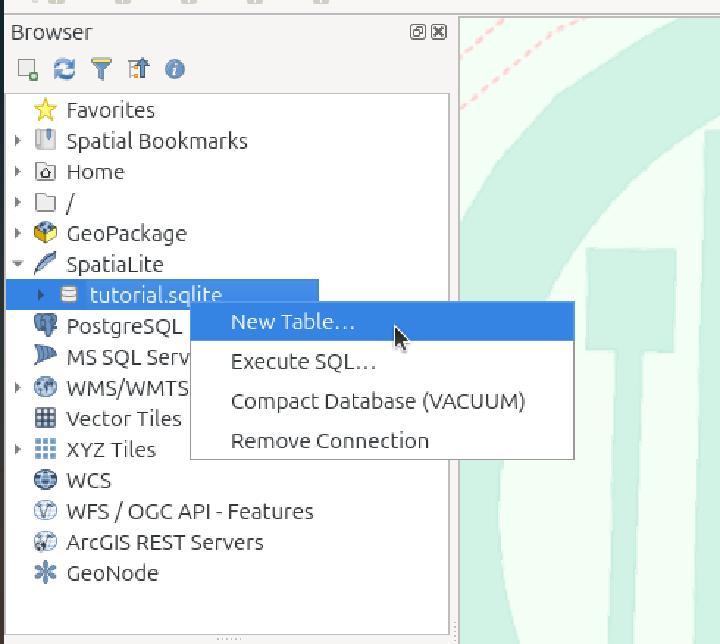
Right-click on the generated database and select “New Table…”
Create the following schema: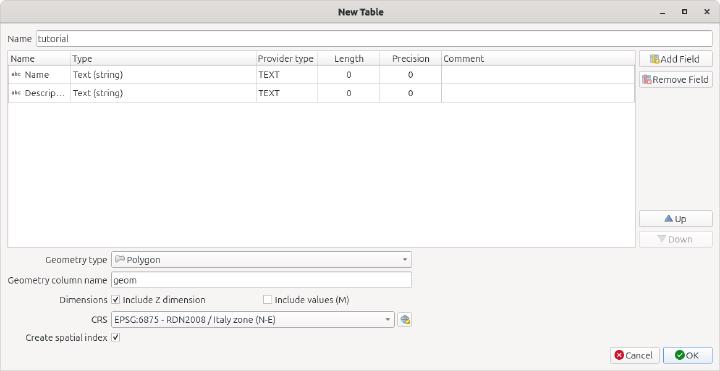
Save with “OK”
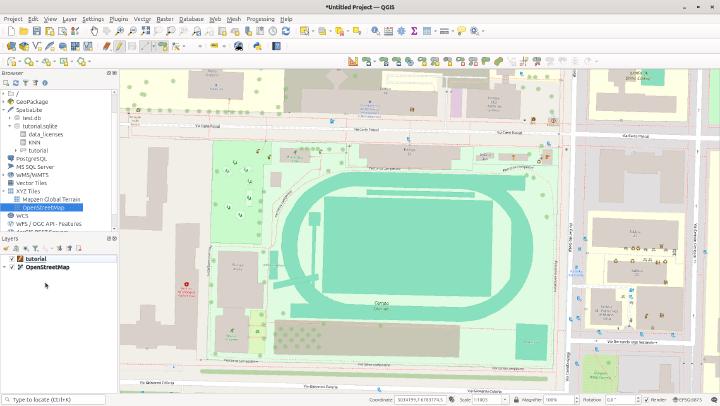
Double click on the newly created table to add it to your layers.
Add other layers below (eg: OpenStreetMap, orthophoto providers, etc…).
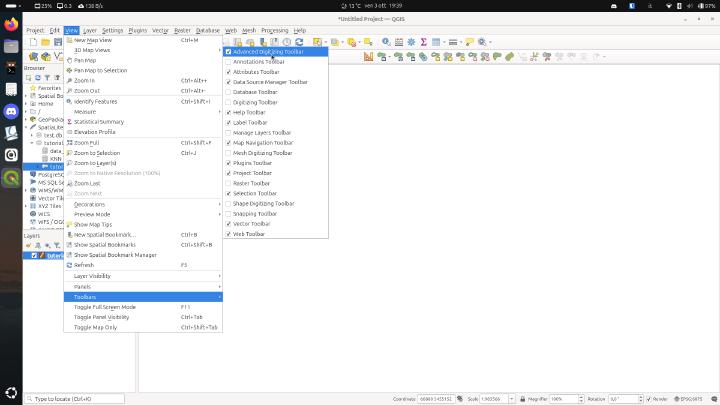
In the top menu, go to “View” -> “Toolbars” and enable “Advanced Digitizing Toolbar”
It should look like:
How to draw
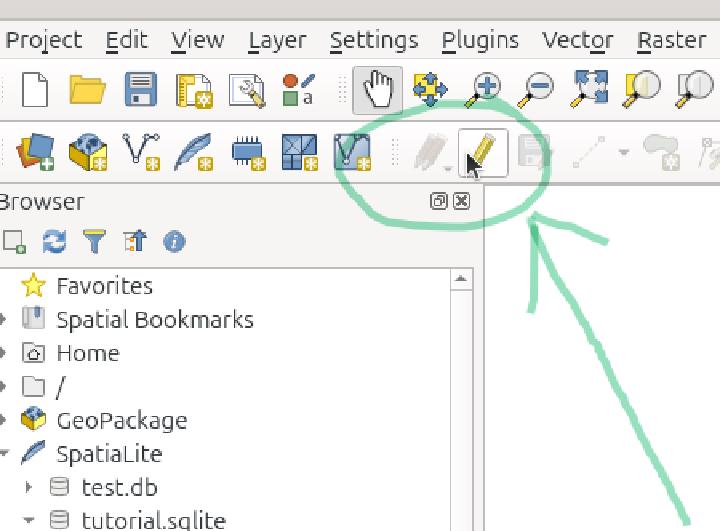
In the layer panel, select the project layer created previously and then press on the pencil icon in the toolbar
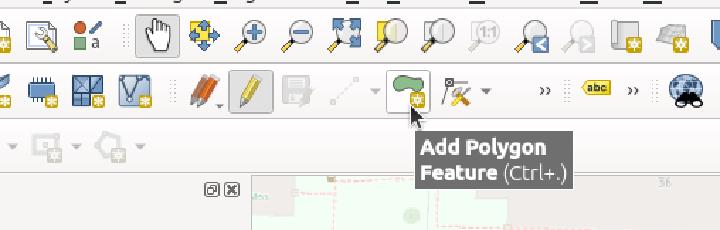
Now you can add your outer perimeter by pressing the “Add Polygon Feature” icon.
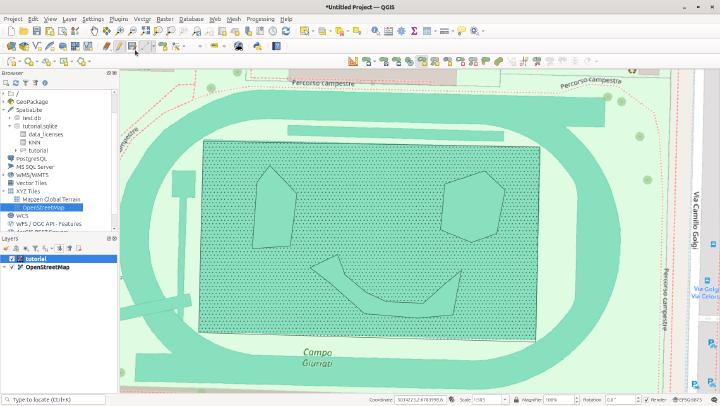
The polygon will obscure everything underneath making it hard to see the obstacles. We can fix this by changing the opacity of the layer.
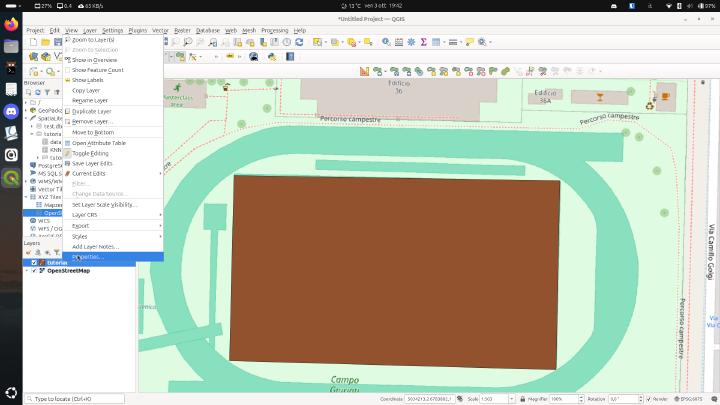
Right click on the layer and select “Properties”
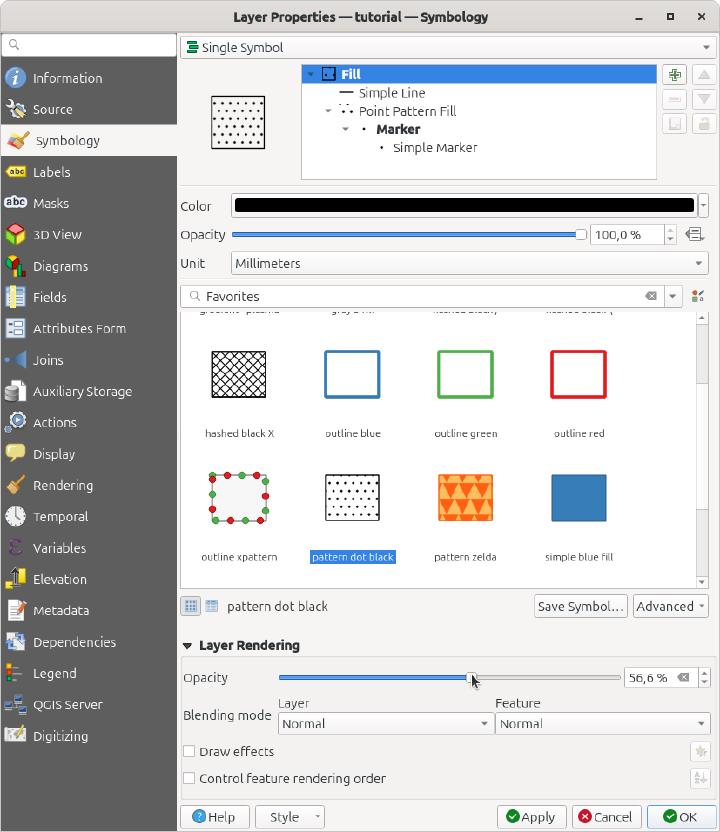
In the new window, use the navigation panel to select “Symbology”.
Open the “Later Rendering” menu at the bottom and change the opacity. Save with “OK”.
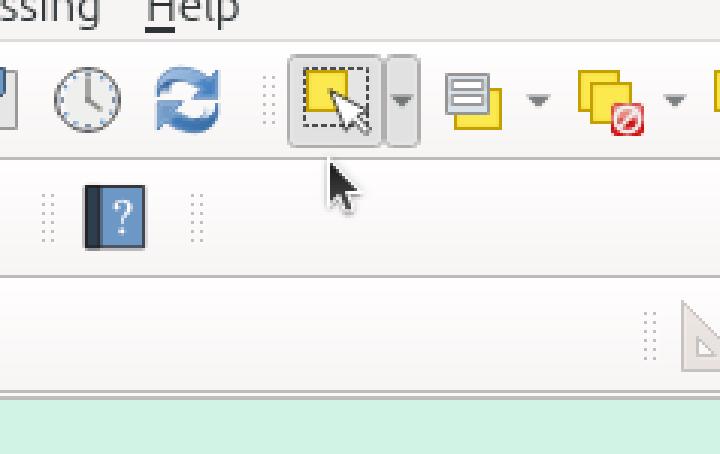
In the toolbars, press the “Select Feature” and click on your previosly created area. It will change color, usually into yellow.
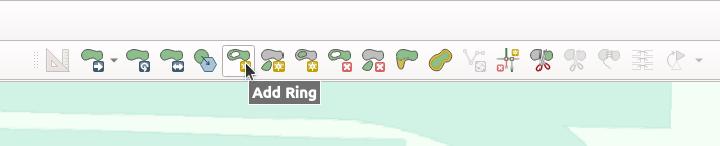
Now we can add the obstacles: select the “Add Ring” from the toolbar and trace the shape of the obstacles.
After being done with it: exit the edit mode by pressing the pencil icon again and save your obect database by pressing the Floppy Disk icon 💾.
To export your file:
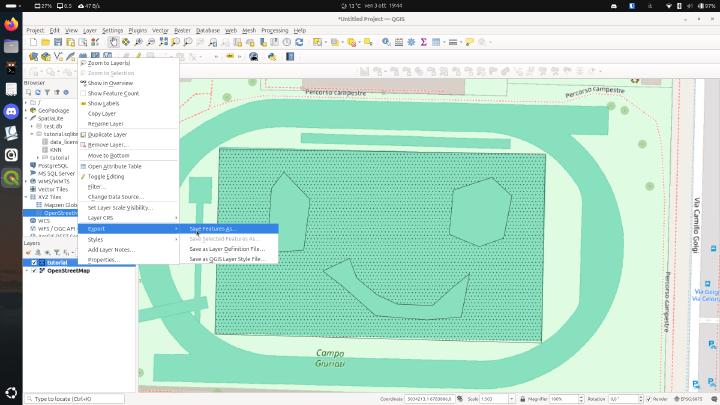
Right click on the object layer and go to “Export” -> “Save Feature As”
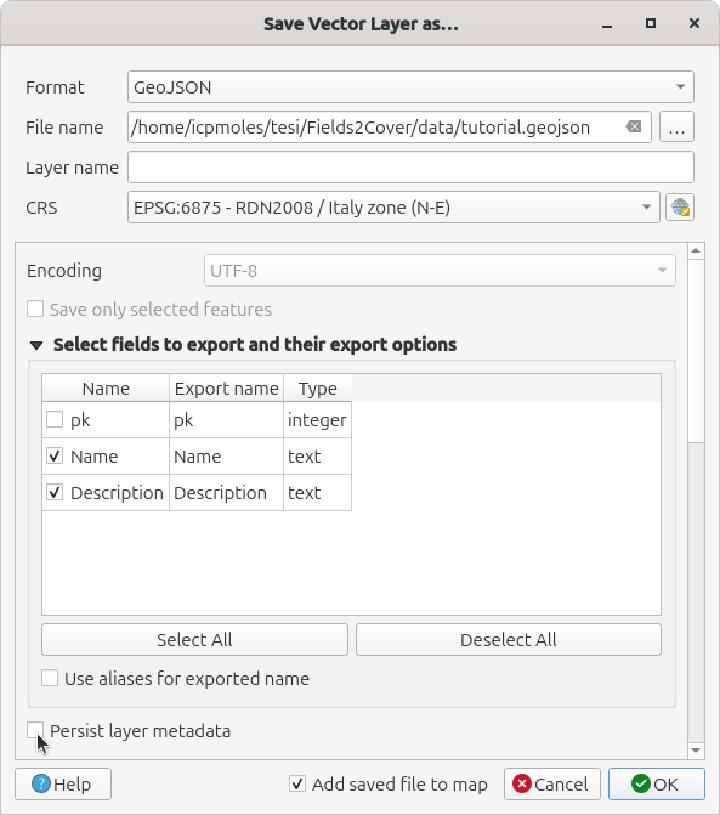
In the new window:
- Select GeoJson as the format
- Pick a destination for the exported file
- De-select the optional integer field
- De-select “Persist Layer Metadata”
Now that you have a “.json” file you can import in F2C with
c++
F2CFields fields;
f2c::Parser::importJson(std::string(DATA_PATH) + "tutorial.geojson", fields);
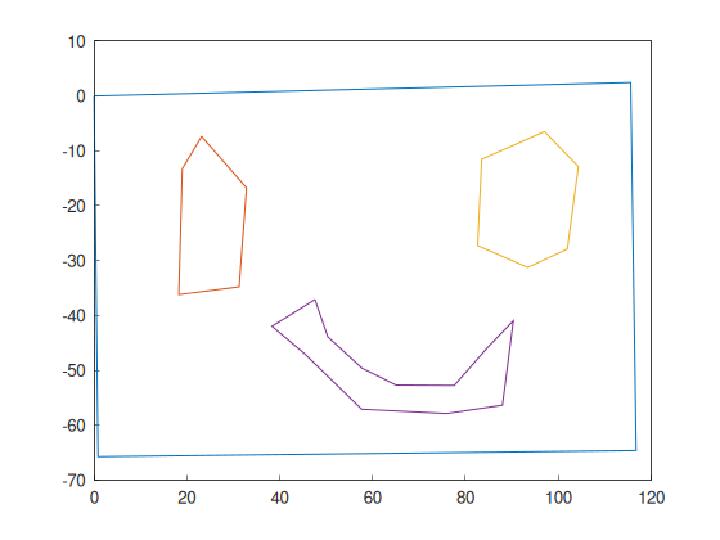
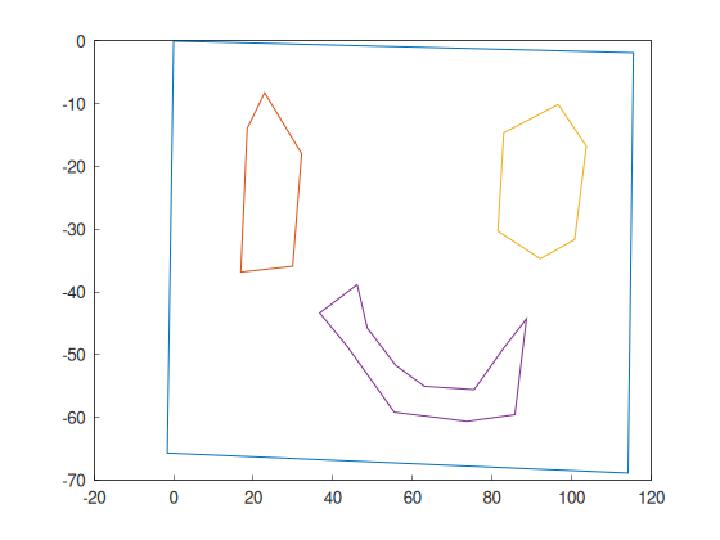
Final result: