Guide for Matteo Matteucci’s Robotics class at PoliMi
Scope: to install the environment needed for the labs without having to deal with Docker or dual booting in Ubuntu.
Target: PCs running Windows 10 or up supporting virtualization.
Basic Installation
First you need to set-up WSL in your machine. From a Windows command line run:
powershell
wsl --update
wsl --install Ubuntu-20.04
And fill the username and password as you please.
Now you should get a linux shell, in other case you can launch it from the start menu (simply search Ubuntu, it should also apper in the recently installed section) or from the dropdown menu of the terminal (my suggested method).
Let’s update some packages as a precaution and then continue.
bash
sudo apt update
sudo apt upgrade -y
n.b: If you’re using the internal PoliMi Wifi you may get some errors, simply switching the Wifi from “Public Network” to “Private Network” should fix it. You may have to change it back once you’re done with this tutorial.
Now we start dealing with the core ROS installation. These commands are taken from the Docker repository
bash
sudo apt-get install -q -y --no-install-recommends dirmngr gnupg2
sudo apt-key adv --keyserver hkp://keyserver.ubuntu.com:80 --recv-keys C1CF6E31E6BADE8868B172B4F42ED6FBAB17C654
sudo  sh -c 'echo "deb http://packages.ros.org/ros/ubuntu focal main" >> /etc/apt/sources.list.d/ros1-latest.list'
sudo apt-get update
sudo apt-get install -y --no-install-recommends ros-noetic-ros-core=1.5.0-1*
source "/opt/ros/noetic/setup.bash"
echo "source /opt/ros/noetic/setup.bash" >> ~/.bashrc
source ~/.bashrc
These are the commands for the “base” ROS installation taken from here
bash
sudo apt-get install --no-install-recommends -y  build-essential  python3-rosdep  python3-rosinstall   python3-vcstools
sudo rosdep init
rosdep update --rosdistro noetic
sudo apt-get update
sudo apt-get install -y --no-install-recommends ros-noetic-ros-base=1.5.0-1*
Now finally for the “perception” ROS package
bash
sudo apt-get install -y --no-install-recommends ros-noetic-perception=1.5.0-1* ℹ️ Note
Basically in the
Dockerfileshared in class what we just did was simply the first section.(This is not a command!)
dockerfile
# Start from the ROS Noetic perception image
FROM ros:noetic-perception
Now we continue with the other installation commands:
bash
sudo apt-get install -y --no-install-recommends nano \
  vim tmux gedit ros-noetic-rqt* \
  net-tools iproute2 ros-noetic-plotjuggler* \
  ros-noetic-foxglove-bridge ros-noetic-turtlesim \
  ros-noetic-tf*
Update for lesson 7
bash
sudo apt-get install -y --no-install-recommends  \
  ros-noetic-stage* ros-noetic-gmapping \
  ros-noetic-slam-toolbox* ros-noetic-move-base* \
  ros-noetic-amcl ros-noetic-global-planner \
  ros-noetic-dwa-local-planner ros-noetic-navfn \
  ros-noetic-turtlebot3-* ros-noetic-teleop-twist-keyboard \
  ros-noetic-pointcloud-to-laserscan
You should already be in the home directory but just in case:
bash
mkdir -p ~/catkin_ws/src
cd ~/catkin_ws/
ln -s /opt/ros/noetic/share/catkin/cmake/toplevel.cmake src/CMakeLists.txt
catkin_make
echo "source ~/catkin_ws/devel/setup.bash"  >> ~/.bashrc
To test it:
In three different tabs execute these commands in this order:
bash
roscore
rosrun turtlesim turtlesim_node
rosrun turtlesim turtle_teleop_key
In case you wanted to run everything in one shot:
After opening the Linux shell:
bash
sudo apt update
sudo apt upgrade -y
sudo apt-get install -q -y --no-install-recommends dirmngr gnupg2
sudo apt-key adv --keyserver hkp://keyserver.ubuntu.com:80 --recv-keys C1CF6E31E6BADE8868B172B4F42ED6FBAB17C654
sudo  sh -c 'echo "deb http://packages.ros.org/ros/ubuntu focal main" >> /etc/apt/sources.list.d/ros1-latest.list'
sudo apt-get update
sudo apt-get install -y --no-install-recommends ros-noetic-ros-core=1.5.0-1*
source "/opt/ros/noetic/setup.bash"
echo "source /opt/ros/noetic/setup.bash" >> ~/.bashrc
source ~/.bashrc
sudo apt-get install --no-install-recommends -y  build-essential  python3-rosdep  python3-rosinstall   python3-vcstools
sudo rosdep init
rosdep update --rosdistro noetic
sudo apt-get update
sudo apt-get install -y --no-install-recommends ros-noetic-ros-base=1.5.0-1*
sudo apt-get install -y --no-install-recommends   ros-noetic-perception=1.5.0-1*
sudo apt-get install -y --no-install-recommends nano vim tmux gedit ros-noetic-rqt* net-tools iproute2 ros-noetic-plotjuggler* ros-noetic-foxglove-bridge ros-noetic-turtlesim ros-noetic-tf*
sudo apt-get install -y --no-install-recommends  ros-noetic-stage* ros-noetic-gmapping ros-noetic-slam-toolbox* ros-noetic-move-base* ros-noetic-amcl ros-noetic-global-planner ros-noetic-dwa-local-planner ros-noetic-navfn ros-noetic-turtlebot3-* ros-noetic-teleop-twist-keyboard ros-noetic-pointcloud-to-laserscan
mkdir -p ~/catkin_ws/src
cd ~/catkin_ws/
ln -s /opt/ros/noetic/share/catkin/cmake/toplevel.cmake src/CMakeLists.txt
catkin_make
echo "source ~/catkin_ws/devel/setup.bash"  >> ~/.bashrc
Quality of life improvements (you can skip this)
If you want an easier tmux experience with mouse support (like scrolling for output history, click to change pane, etc) and color:
bash
cd $HOME
touch ~/.tmux.conf
echo "setw -g mouse on" >> ~/.tmux.conf
echo "setw -g default-terminal "tmux-256color"" >> ~/.tmux.conf
Cloning
Now your ROS developement environment is fully functioning, so we can just “clone” the distro to be able to interact in a multihost configuration. Write down your Ubuntu username, it’s just the name of the account that we setup in the first step. It also appears before the @ in your shell.
bash
sudo nano /etc/wsl.confNow we have to modify the text file into this:
conf
[boot]
systemd=true
[user]
default=UsernameThatIJustToldYouToWriteDOwn
And now just CTRL + O to save, same name,CTRL + X to exit.
Now create an empty folder in a place of your liking (possibly in a disk with at least 20Gb)
Open a Powershell terminal in that folder and type:
powershell
wsl --shutdown
wsl.exe --export Ubuntu-20.04 UbuntuRosBck.tar
Just wait….
If everything went correctly then you can type in the same terminal:
powershell
wsl.exe --import UbuntuRosSecondary ./filesystemsecondary UbuntuRosBck.tarWait, again. As soon as the process is complete we can just launch the instance with
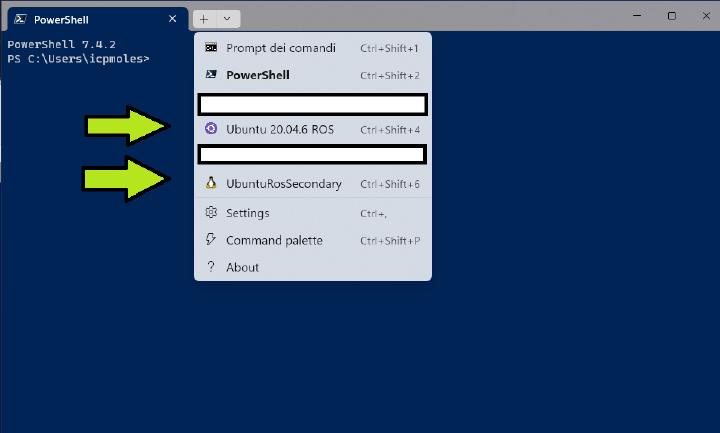
powershell
wsl.exe --distribution UbuntuRosSecondary Now we have two identical WSL instances that we can launch from the start menu or from the terminal drop down.
Now, going back to the directory where we exported the backup at the start of this step we have two big files: UbuntuRosBck.tar and filesystem\ext4.vhdx
⚠️ Warning
Precaution when moving the generated files pt. 1
For
filesystem\ext4.vhdx: DON’T TOUCH, MOVE OR DELETE IT. It contains all your data.
💡 Tip
Precaution when moving the generated files pt. 2
For
UbuntuRosBck.tarinstead you can either delete it or you can also share it with your friends.
Testing
With this configuration you don’t have to fiddle with Master IPs and such like for Docker. To test it just run like this:
bash
roscore
rosrun turtlesim turtlesim_node
rosrun turtlesim turtle_teleop_key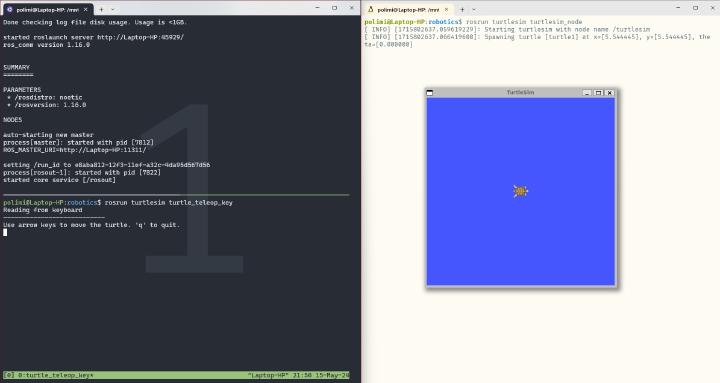
Sharing is Caring
UbuntuRosBck.tar basically contain a full linux distro with all the ROS packages already installed. You can transfer it on their PC and then in an empty folder just run:
powershell
wsl.exe --import UbuntuRosPrimary ./filesystemprimary UbuntuRosBck.tar
wsl.exe --import UbuntuRosSecondary ./filesystemsecondary UbuntuRosBck.tar
Ideally this should just run™
Be mindful to not put anything personal or harmful inside and to give them the password you used in the first step. It’s technically a local VM so it shouldn’t bee too much of a risk from that point of view.
❗ Caution
Just in case it’s not clear:
Your WSL password, not your Windows password!
Also, like for the previous section: please never delete the filesystemprimary\ext4.vhdx and filesystemsecondary\ext4.vhdxfiles but you can delete UbuntuRosBck.tar file without causing problems.
Quick course in WSL
In case you never used WSL these are some nice tips that can become handy when developing with ROS.
VS Code Integration
If you have VS Code installed in Windows then you can open it in your current directory with just
bash
code .Don’t forget the point.
For code completion, in your catkin_ws:
From the linux shell.
bash
cd ~/catkin_ws
mkdir .vscode
cd .vscode
touch c_cpp_properties.json
cd ..
code .
Install the catink_tools extension.
Then paste this in the .vscode/c_cpp_properties.json file.
json
{
    "configurations": [
        {
            "name": "Linux",
            "includePath": [
                "${workspaceFolder}/**",
                "/opt/ros/noetic/include"
            ],
            "defines": [],
            "compilerPath": "/usr/bin/gcc",
            "cStandard": "c17",
            "cppStandard": "gnu++14",
            "intelliSenseMode": "${default}",
            "configurationProvider": "b2.catkin_tools"
        }
    ],
    "version": 4
}
Accessing your files
At any moment you can launch your Windows file explorer in the current directory with just
bash
explorer.exe .Don’t forget the point.
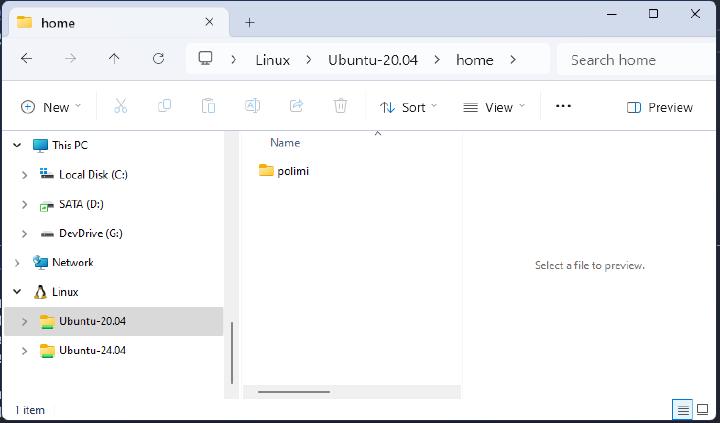
It will also show up in the left bar of the built-in file explorer.
To access your ROS file simply go to ubuntu-20.04 -> home -> "your username" -> catkin_ws